Sunday, November 30, 2008

Daring Bakers: Caramel Cake with Caramelized Butter Frosting

So I'm slightly late. Only a few hours. Call it fashionably late. And I had good reason. My parents just left and I didn't have a whole lot of baking time when they were here. Thanksgiving was enough cooking for me. I'll probably post more about that later.

Reason #2 is because today is my birthday. Birthday's are supposed to have cake. Thanksgiving has turkey; 4th of July has burgers; birthday's have cake. Some things just go together. So I figured I'd make this cake for my birthday. I know, kinda sad to be making your own cake for your own birthday and eating it at home by yourself but oh well. I still want cake. People just for the sake of saying you are not alone, not so much.

Now I was a little worried because I read about some of the failures other people had and having to remake stuff to make it work and all. But I devoutly stuck with making it on my birthday. Besides, I didn't have anything else planned and that and cleaning up the mess my parents left and making some bread to make sandwiches with the leftovers would fill my day.

Anyway, off I went to make the cake. This month's challenge, in case you didn't read the title for some reason, is Caramel Cake with Caramelized Butter Frosting. The recipe was written by Shuna Fish Lydon of Eggbeater who I guess has some fancy pants bakery in the Bay Area that I'll probably never get to actually try, which is also kinda sad but besides the point. It is was chosen by Dolores, Alex, Jenny, and Natalie though you should really go do the Daring Bakers Blogroll if you want to see more. Hopefully I'll still get counted; they said you had to have links and stuff in your post but they never said they were gonna check the date although the date is obviously important.

This recipe was clearly written for me because it said to start by having a bowl of ice water ready in case you burn yourself. I followed this step. Woohoo! Look, I actually followed part of the recipe! This is good for me. And I didn't even need it. I used the bowl of ice water to cool down the syrup so I could get going on the rest of the cake even though I was waiting on everything to come to room temperature but I was impatient. I wouldn't recommend doing that because it got too cold and then I had to warm it back up to room temp while whipping it up.

It didn't take anywhere near as long as I thought it would. It took me 4 hours to do everything, which included letting things cool and making bread (that'll maybe be a separate post depending on how it comes out). So this worked out really well for me.

I'm not posting the recipe. If you go to pretty much any of the links at the top of the post you can get the recipe. I actually followed it pretty well this time.

Here's the start of the Caramel Syrup.


Here it is cooling. Nice and golden brown. It looks darker in real life. Like a Grade B maple syrup. And thick like Aunt Jemima's syrup, not maple syrup. It's got a dark really caramelly flavor; dark is the best way I can describe it. I still have about a cup worth of it left. Any thoughts on what I should do with it?


Here is the cake, done baking before icing. The texture was nice and delicate. I lined the pan with parchment paper before baking. I find that's the best way to get it out of the pan. No matter how much I try to butter and flour or cooking spray or anything else it newe seems to work quite right. Parchment me-proofs it.

The flavor is quite sweet. Which will be interesting with the super sweet frosting.


This is the finished cake. This is actually pretty for me. I know, not pretty for Daring Bakers' standards but pretty for me.

Friday, November 28, 2008

Barefoot Bloggers: Herb Roasted Onions

My parents came to my house for thanksgiving. Among a few other traditional Thanksgiving items, I made the Herb Roasted Onions that everyone else posted a few weeks ago. So I'm a little slow. At least I made them.

This actually worked out well because my Thanksgiving menu was a bit heavy on the protein and starch and this allowed me to attempt to call it a somewhat balanced meal. I tried to get brussel sprouts on Wednesday but when I went to the grocery store they didn't have any; no fresh ones and not even frozen ones! I was at a bit of a loss because I really didn't have a whole lot to my menu besides turkey and starch.

Fortunately I thought of this recipe. I bought a probe thermometer just for the turkey though I know it'll prove useful for other things as well but it didn't work out. It said the turkey was done about an hour into cooking. So then I was left to guess when the turkey would finish and therefore when to start prepping everything else. About an hour and a half into the turkey I was getting bored and decided to start prepping the sides. These took all of about 2 minutes to mix together the dressing and prep the onions. While good in general for a food prep thing, it didn't keep me busy long enough. Everything was ready to go so at 2.5 hours I decided the turkey should be done.

The onions went in the oven when the turkey came out, along with a batch of Crash Potatoes and a tray of Mac 'n cheese. I trimmed the stems back enough so that by the time they were done, pretty much all of the onion pieces separated. Which is a good thing. No one wants a big clump of onion.

These came out pretty good, though not extremely exciting. I had a number of other somewhat sweet sides so the sweetness of the onions may not have shined the way they would have if I'd had it with just a steak or piece of chicken or something.

There was too much going on that I didn't take a picture of them. They weren't very pretty anyway. My food tends not to be pretty so sometimes I wonder why I even bother posting a pic but they were good and now they are gone. Maybe I'll make them again sometime and take a pic then.

Thursday, November 27, 2008

Barefoot Bloggers: Mexican Chicken Soup

I know it's Thanksgiving so I should have a Thanksgiving post. Instead I am posting this Barefoot Bloggers soup that I made a few weeks ago.

So the other weekend I ended up getting sick. Of course it was the first time I had plans for the weekend since I had moved into my house so naturally I ended up sick. So the weekend that was supposed to be about relaxing and having fun was not as fun as I hoped. I guess I ended up running a fever at some point. And our ambitious plans to go out and do stuff resulted in us renting a couple movies and me falling asleep and being feverish.

I had the recipe for this Mexican Chicken soup printed from when it was chosen for Barefoot Bloggers and I determined this would be a good time to make it. A nice hot bowl of chicken soup is supposed to fix everything so I had at it.

I used 2 boneless skinless breasts because I had those in the freezer. And I used a small can of fire roasted tomatoes rather than the large can of whole crushed tomatoes. And I used a pot that was clearly too small for this soup. Other than that I stuck with the recipe. This is actually pretty good for me. Oh and I wasn't great about watching the time so I'm not sure how I did with timing relative to the recipe but it came out decent.

Now I had some concerns with this recipe. I don't like tomato soup. And I not real big on spicy food. And I've never really made soup that came out good before. So I wasn't extremely optimistic about how this would come out. I had a can of Progresso in the pantry in case this didn't work out so well.

Well I have to say I am quite happy with this soup. It came out hearty but not overly rich; flavorful but not over spiced (also, I didn't add all the salt that it called for, I don't seem to like a lot of salt and therefore often under season my food) and it was just very satisfying.

And it helped open up my sinuses a bit.

I had a couple bowls and then 4 quart containers. I froze 2 for future needs and left 2 for lunches for the week.

You can go to the links above if you want to see the recipe.

Tuesday, November 25, 2008

Banana Bread

I've been needing to make some of my classics. This week I made my Banana Bread. This is another one of my basic recipes that I usually make every couple weeks or so. I didn't take this loaf to work because I figured I wanted to have something around for breakfast when my parents were here.

I started with this recipe on All Recipes. It's a good classic though I've made my few modifications like always. And I don't always have the same modifications. Depends on my mood and what's around the kitchen. Most of the times I do butter, not applesauce. Sometimes I add cinnamon and/or nutmeg. Sometimes walnuts, chocolate, other nuts or anything else I find around the house. Anyway, this recipe has always been good to me.


Banana Bread

1/2 cup applesauce
3/4 cup brown sugar
2 large eggs
1 tsp vanilla
3 bananas, mashed
2 cups flour
1 tsp baking soda
1 tsp salt
1 tsp cinnamon
1/2 cup walnuts

Preheat the oven to 350. Mix the applesauce and brown sugar in a medium bowl. Mix in the vanilla and eggs, one at a time. Mix in the bananas. Mix together the flour, baking soda, salt and cinnamon. Mix it into the wet mix, just to moisten. Mix in the walnuts. Line a loaf pan with parchment paper and pour in the batter. Bake for 1 hour or until a toothpick comes out clean. Allow to cool a bit before eating.

Sunday, November 23, 2008

Barefoot Bloggers BRC: Chocolate Orange Cake

J visited this weekend. We spent most of the weekend just hanging out and watching Gossip Girl. I am totally taking up their thing of just using the first letter of their name. It was one of those sick pleasures. Who needs to get dressed or leave the house. After she left I figured I should probably make some food for the next few days.

I attempted to make the Chocolate Orange Cake that was chosen this month as one of the Bonus Recipe Challenges. I know, I'm a few days late but that seems to be the trend with me. Now, I didn't have any small molds so I decided to make it in a 9" square pan and cut it up.

I used tangerine instead of orange since that's what I had. And I used applesauce instead of butter because I decided to pretend I was making something healthy. Overall it came out OK except that I undercooked it a bit and the piece that was in the middle wasn't all the way cooked but that became my chef's snack. The chocolate pieces also seemed to settle to the bottom of the cake but that's OK. I may retry this recipe again at some point.


Thursday, November 20, 2008

Barefoot Bloggers BRC: Chive Risotto Cakes

This month there were 2 recipes chosen for the BRC (bonus recipe challenge). I got to this one, hopefully I will get to the other one at some point.

This was an interesting recipe because it is a way to make risotto cakes without having leftover risotto. You make fake risotto with yogurt and eggs instead of the starchy goodness to bind it together and then bread and fry.

I can't say this recipe worked for me very well. I made them one morning when I woke up starving at 4AM. Sadly this has happened more than once. The waking up at 4AM, not the making risotto cakes. Maybe because I have a tendency of falling asleep at 7 or so when I get home.

The upside was that I didn't cut myself. The downside is the risotto cakes really didn't come out well and I burned myself. They were salty (which was my error because I oversalted the rice) but bland (which might also be my fault because I used 2 green onions, which was all I had, instead of 3 tablespoons of minced chives. I had issues getting it to form a nice ball (which might also be my fault because I used regular plain yogurt rather than greek yogurt and I didn't strain the rice because it looked pretty dry). So the gist of it is, it came out pretty bad (although barely edible, which is better than inedible) and I don't care enough to try again to try and make it right.

And here is the chronological version that might make a bit more sense. I woke up at 4AM hungry and realizing I needed food for the next day for lunch. So I decided I was going to make these risotto cakes. So I head downstairs and start cooking. I got a pot of water and the stove and salted it like you salt the water for pasta. That was mistake #1. I figured it needed to be salted because that's what the recipe said but I figured the amount of salt was not really intended to be measured, like with pasta.

So then I let it cook and started to prep the other stuff. I had plain yogurt in the fridge so that is what I decided to use rather than greek yogurt. I also didn't measure it, figuring I'd just eyeball a half a cup. Mistake #2.

I only had the 2 green onions so that's what I used. I figured it wasn't really intended to have a real strong oniony flavor so it would be OK. It was probably about 2 tbsps of green onion so I figured I would be close enough. Mistake #3.

So then the rice had cooked for about 20 mins, like the recipe said and there was almost no water left in the rice so I figured I would just add it as is. I figured the little bit of water would be irrelevant because if I rinsed it there would just be more water and the starch that was left in the water would help pull it together anyway. Mistake #4.

So I mixed the rice in and tried to form a ball but it was much too liquidy and soft it wouldn't hold together. I tried dropping a spoonful into the breadcrumbs and then tossing it around. That didn't work. In this process I got it on my hands so I gave it a little taste. All I could taste was overwhelming amounts of salt.

At this point the goal was just to make something edible, I didn't really care if it was good any more. Good clearly was not going to happen. I decided the only way to dilute the salt is to make another cup of rice without salt and mix it in. This time I drained and rinsed the rice too. This got the salt content down and thickened up the mix a bit but it was still not holding a ball very well. I managed to fry up a couple so I could have something for lunch. They were edible. That's about the best I can say for them.

I mixed in some italian seasoned breadcrumbs to help bind it and give it some flavor. I stuck the mix in the fridge so that the cold would help firm it up and I could give it another shot when I got home. When I got home I fried up the rest. They were a little better though definitely still not good. I have some in the freezer that I guess I will use like a tater tot type replacement if I am craving fried starchiness and also because I can't really handle any more of them right now. This was a failed mission. This is the first Barefoot Contessa recipe that I have tried that I wasn't happy with. How sad. Next time I'll just make risotto.

Wednesday, November 19, 2008

Pumpkin Pie

I haven't made a pie in ages. Since Pi Approximation Day probably. And those weren't really pies anyway. But I keep seeing stuff about pies.... all sorts of pies.... apple pies, pie crust competitions, and then I saw this post and I knew I had to make it. It looked so good (and the instructions were simple and I had all the ingredients so no subs) that I actually followed it!

I bought the pie crust because this was an impulse thing because I hadn't baked anything in about 5 days and making crust would have taken too long. My strainer clearly wasn't that fine mesh because I didn't have too much trouble straining it. I don't actually know how much ginger I used because I just took the knob out of the freezer and grated some into the pan until it looked good. The filling made 2 pies... the recipe only states 1 but after I made the filling it definitely was not fitting in 1 shell and it filled 2 pretty well.

The pie came out really good and silky smooth. It was mildly spiced, lots of good pumpkiny flavor and not overly creamy although my judgement on this was probably not the best because I was still recovering from a cold and my smell and taste were off. I brought them to work and they went quickly, but everything seems to go quickly at work so far so that doesn't really tell you anything. It was definitely better than the pumpkin pie I had made for Pi Day. Maybe I will make it again for the next Pi Day... if I decide to do it, which is still to be determined.

Since I took the pies to work, I don't have any pics of it sliced but it was very smooth. It kind of looked like it wasn't cooked all the way through at the center before I cut into it but it was set up when I sliced it.

Sunday, November 16, 2008

Barefoot Bloggers Catch Up: Apple Turnovers

So I've started trying to catch up on all the food blogging that I didn't do while I was moving. I have about 30 recipes stuck on my refrigerator plus more that I haven't gotten around to printing yet. I am not sure I will ever catch up... I see so many recipes that I want and then I never seem to get a chance to make all of them. Not to mention, I never seem to be able to follow a recipe and I end up screwing them up half the time so then I either have to retry it or call it a flop.

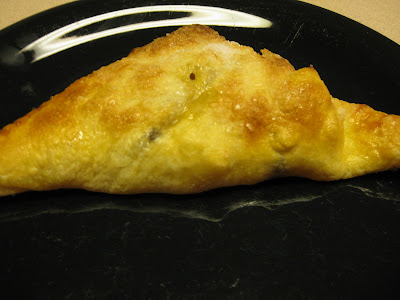
Anyway, I decided to do one of the Barefoot Blogger recipes. Apples are still in peak season so I made Apple Turnovers. It's a real simple recipe, though I still failed to follow it. It called for dried cherries but I had raisins; it called for orange juice and zest but I had lemons; it called for 3 apples but I bought 4 because I couldn't remember what I needed so I bought 4 figuring that would be plenty. I ended up needing to roll the puff pastry out thinner to make it big enough for all the filling and I got tired of waiting for it to thaw because i didn't think to put it in the fridge or take it out to thaw until i wanted to roll it.

While my pastries weren't perfect, they still tasted good. They were pretty good fresh but they kinda lost that crispy goodness once they got cold.

Friday, November 7, 2008

A quick dinner of Baby Bok Choy and Ramen

One of the exciting things about moving here is there is an Asian grocery store about a block from my house. I went there last week. The only problem was I didn't really know what I had at home and what I wanted to make. I was driving by it so I decided to stop. I bought some baby bok choy and a couple sauces.

Well the other day I came home and was dead tired and starving. Tired won so I went to bed. I woke up at 1AM starving. I was half asleep and I saw the bok choy in the fridge. I took it out and put it on a cutting board so I could open up the bunches. Well in my half asleep stupor, I was holding the bok choy in my right hand and cut it with my left. That's when I realized the knife was on my finger, not the bok choy.

After I cleaned up my wonderfully cut finger I went back to my quest for food. At first was just going to cook up some of it. Then I figured that would not fill me so I'd end up making something else. I made some ramen and combined the two. Woohoo. A cheap relatively tasty and maybe not too bad (it's got a vegetable, it's not all carbs!) for you meal. And it took less than 10 mins to make!


Bok Choy and Ramen

4 heads of baby bok choy, chopped to remove the stem holding them together
1 tbsp soy sauce
1 tbsp oyster sauce
1 tsp rice wine vinegar
a splash sesame oil
1 pack chicken flavored ramen (preferably with the seasoning packet and the oil packet)

Heat the baby bok choy in a sauce pan on medium.
Add a little water to help the bok choy wilt down.
Add the soy sauce, oyster sauce, vinegar and oil.
Cook about 2 mins.
Add enough water so that it is deep enough to cook the ramen and bring to a boil.
Add the seasoning packets.
Add the ramen noodles.
Cook just until ramen noodles are done.
Eat.

Monday, November 3, 2008

Barefoot Bloggers Catch up: Butternut Squash Risotto

I did another catch up recipe from the Barefoot Bloggers. This time I did the Butternut Squash Risotto. It's the perfect season for butternut squash now so I picked one up.

This year was the first time I've ever cooked butternut squash. Sad, I know. I never really ate any gourds growing up and well... I've had it now. It's quite tasty. Earthy and mildly sweet. Quite a bit like sweet potatoes.

As usual, I followed the recipe somewhat loosely. I don't seem to be capable of following a recipe as it is written. Even when I intend to follow a recipe exactly as it's written something inevitably happens. Maybe I need to seek help in this matter.

Anyway, I made approximately 1/3 of the recipe.... I would have been eating risotto for the next 6 months if I made the whole thing. And I pureed the butternut squash before adding it (though not all that well). And I didn't have any wine so I just used a bit more chicken stock. And I didn't have any shallots, pancetta or saffron so I just used onions. Below is my recipe.

I had it with soy balsamic glazed chicken thighs. I know, they don't really go together but you should be used to that by now.


Butternut Squash Risotto
  • 1/2 butternut squash
  • 2 tablespoons olive oil
  • Kosher salt and freshly ground black pepper
  • 2.5 cups chicken stock, preferably homemade
  • 2 tablespoons unsalted butter
  • 1/4 large onion, finely chopped
  • 1/2 cup rice
  • freshly grated Parmesan

Preheat the oven to 400 degrees F.

Peel the butternut squash, remove the seeds, and cut it into 3/4-inch cubes. Place the squash on a sheet pan and toss it with the olive oil, 1 teaspoon salt, and 1/2 teaspoon pepper. Roast for 25 to 30 minutes, tossing once, until very tender. Puree in food processor.

In a pot melt the butter and saute the onions on medium-low heat for 10 minutes, until translucent but not browned. Add the rice and stir to coat the grains with butter. Add about 1/2 cup stock, salt and pepper and cook for 2 minutes, stirring occasionally. Each time, cook until the mixture seems a little dry, then add more stock. Continue until the rice is cooked through, but still al dente, about 30 minutes total. Add the roasted squash puree and Parmesan. Mix well and serve.

Saturday, November 1, 2008

Barefoot Bloggers Catch up: Mac 'n Cheese

Yesterday was a lazy day. I woke up about 8 but just puttered around the house a little and watched TV in bed for most of the day. I just couldn't seem to get going. It didn't help that I didn't really have anything planned for the day. Finally at about 3PM I decided to get up and shower and find something to do.

I'm starting to make the recipes that I want to catch up on for Daring Bakers and Barefoot Bloggers. I decided to do the Grown Up Mac 'n Cheese tonight. If you want to make it for real you should use the link and follow the real recipe. I interpreted it pretty loosely. But it came out good so mine is below. It's quite rich and really creamy.


As a tribute to Pottsville (or maybe Catholics or where ever it stems from) I had it with fish sticks. No stewed tomatoes though. THose are just ick.

  • 4 ounces thick-sliced bacon
  • Kosher salt
  • 2 cups elbow macaroni or cavatappi
  • 1 1/2 cups milk
  • 2 tablespoons all-purpose flour
  • 4 ounces Asiago cheese, grated
  • 3 ounces extra-sharp Cheddar, grated
  • 2 ounces Gorgonzola
  • 1/4 teaspoon freshly ground black pepper
  • Pinch nutmeg
  • A dash of Frank's Red Hot
  • A sprinkling of dried parsley and basil
  • 1 cup of frozen peas
  • Panko bread crumbs

Preheat the oven to 400 degrees F.

Cook the bacon in a large pan. Transfer the bacon to a plate lined with paper towels and crumble when it is cool enough to handle. Leave the drippings in the pan. Add flour to the drippings and mix well to incorporate. Add the milk to the pan and bring up to a boil, mixing well to incorporate until thick and smooth.

Off the heat, add the everything except the pasta, breadcrumbs and a small handful of cheddar cheese to the sauce.

Cook the pasta according to the directions on the package. Drain well. Add the cooked pasta, peas and crumbled bacon to the sauce and stir well. Pour into a large baking dish.

Sprinkle breadcrumbs and any leftover cheese over the pasta. Bake for 35 to 40 minutes, or until the sauce is bubbly and the macaroni is browned on the top. Allow to cool for a few minutes before eating if you don't want to burn yourself.

Cinnamon Bun Trauma

I have made cinnamon buns many times. I started with Alton Brow's recipe, practiced a whole bunch, made my own little tweaks on it and ultimately had my cinnamon bun recipe. I've made it probably 20 times or so with very consistent results.

After I got settled in a little, I made my pasta and stuff, which was really successful. My kitchen layout is wonderful. I have so much more working space and it's all right by the stove so it works really well. I was giddy with the prospects of everything I was going to make and how tasty it was going to be.

I figured I'd make my tried and true cinnamon buns so that I could bring them to work and get my boss off my case for not having any baked goods that day. I had made a pot of oatmeal over the weekend as well so I had that for breakfast and I brought the tray in without trying them first figuring they would be good like they always are.

I brought them to our Monday morning meeting and dished them out. Other people started trying them first while I was scooping them out but I assured them they would be good because I'd made them so many times. After I got a bunch out I grabbed one to have myself even though I wasn't really hungry I figured I needed to have one before they were gone.

Well this was rather traumatic. It was hard and tough and all sorts of not good. The flavor was good but the texture was all wrong. It was supposed to be gooey and soft and all sorts of wonderfulness that is cinnamon buns. It was all sorts of wrong.

That night I came home and started another batch. I baked them Wednesday night even though I had some sort of nasty stomach unhappiness. Unhappiness that kept me from tasting them that night. They came out slightly better but still not quite right.

So I will do another batch this weekend and see how it goes. This needs to be resolved.